Learn
Adobe XD Plugin
The plugin for Adobe XD lets you use design tokens of your Toolabs design system to style Adobe XD designs.
The plugin lets you manage tokens and themes without leaving Adobe XD but for documenting your design system or for exporting design tokens you need to go to Toolabs DSM web editor.
Here, we will focus on the features specific to Adobe XD.
Getting the Plugin
To get the Toolabs DSM Plugin for Adobe XD, you’ll need to install the latest version of Adobe XD. Then you can download and install the plugin from this link :
Install the plugin for Adobe XD
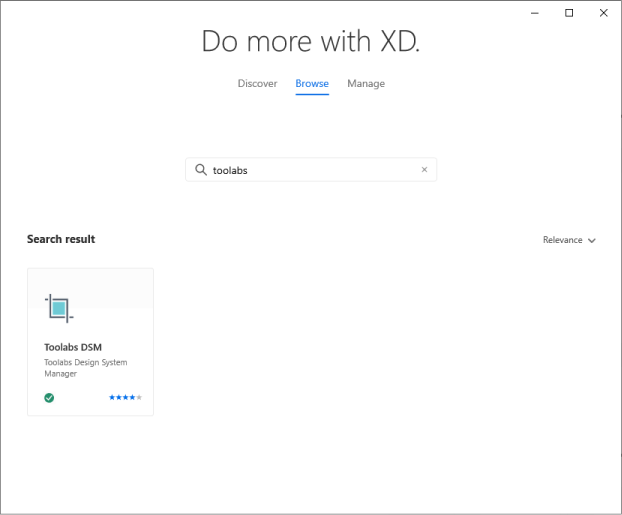
➥ You can also install the plugin from the Plugin Manager of Adobe XD by searching for Toolabs.

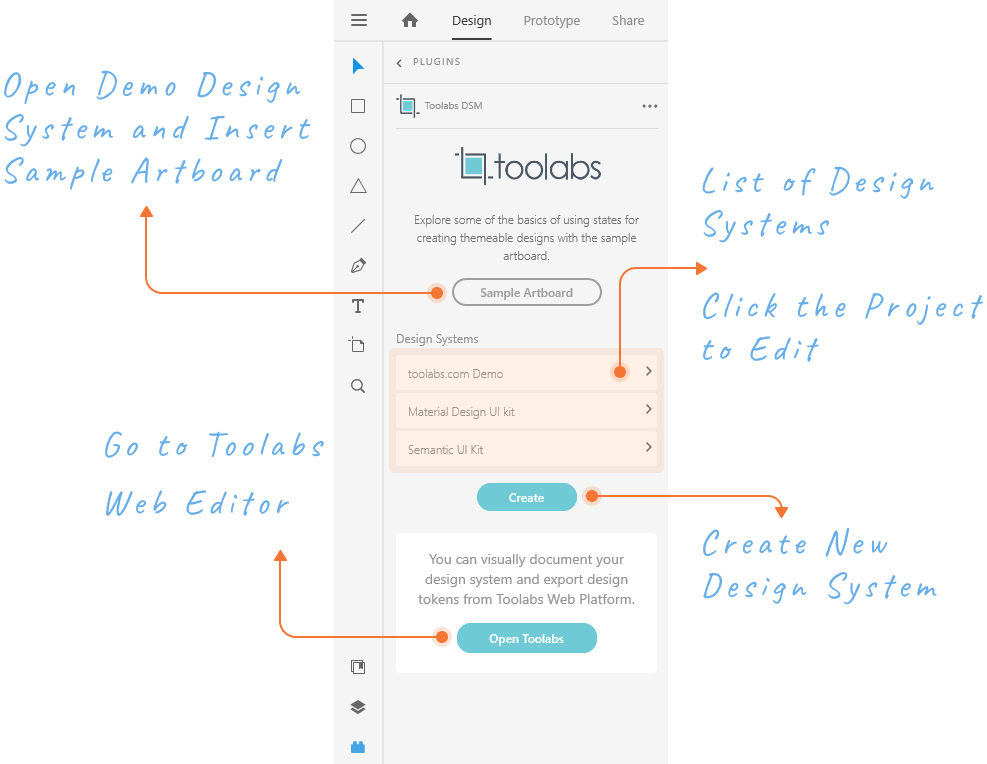
After installing and launching the plugin, you will need to sign in to Toolabs to access your design system projects. When you click the Sign in button, Toolabs web application will be opened in your default web browser. After signed in, you can close the browser and switch back to Adobe XD where you will see the following main screen of the plugin.

Creating a new design system project or opening an existing one from the list of projects is straightforward.
Creating and Using Design Tokens
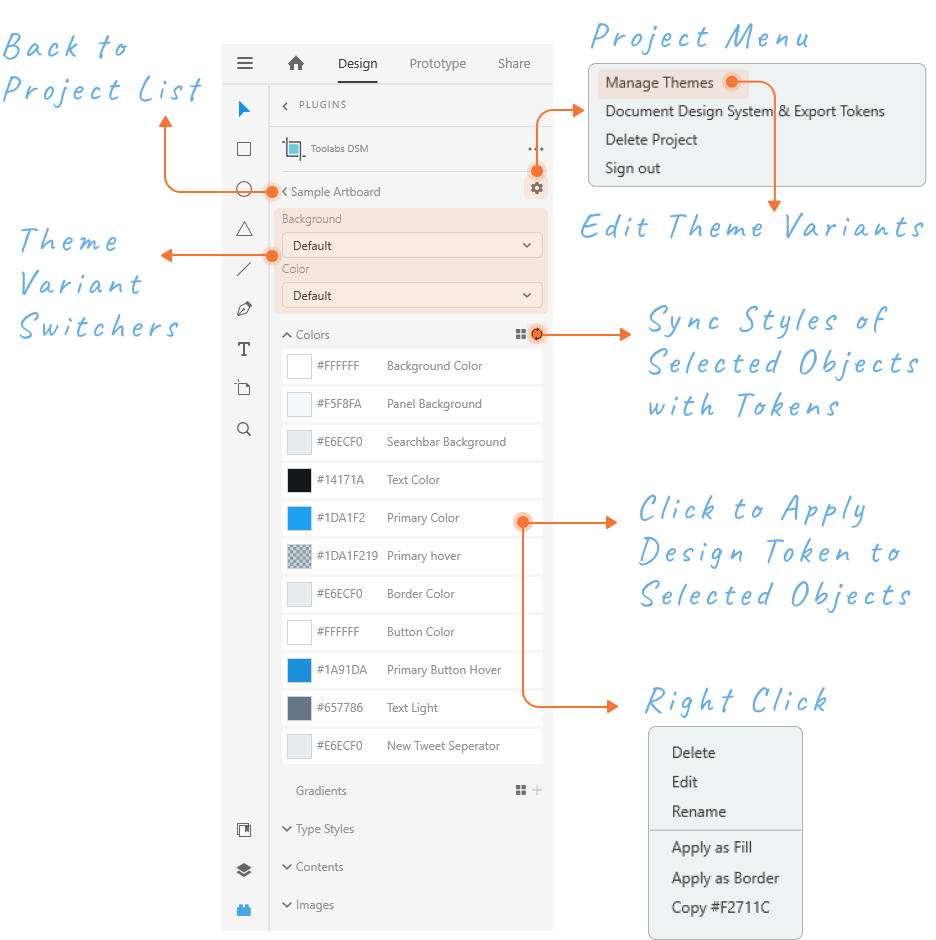
Applying design tokens to objects is similar to using assets of Adobe XD . Simply, select the objects in your artboards and then click the token item on the plugin to apply the token's style to the objects .
You can also right-click a token item and use the context menu to apply it as a stroke color to the selected objects.

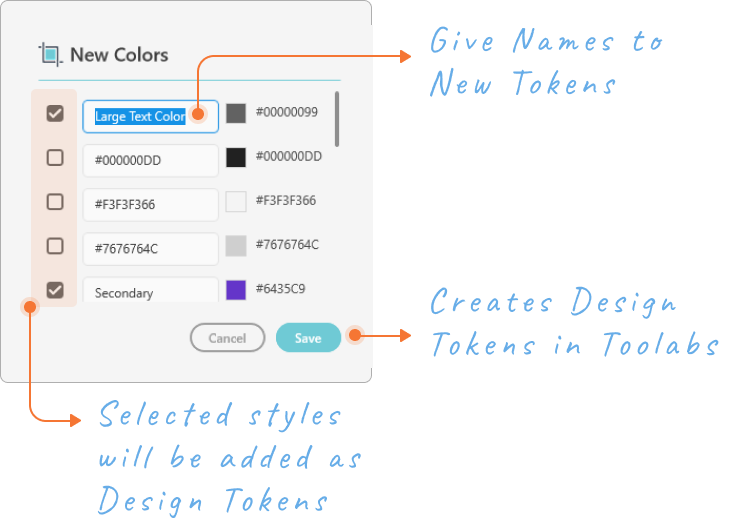
Adding new design tokens is also similar to adding assets to Adobe XD. You can select a layer, group, or entire artboard(s) and click the sync button on the token list header in the plugin. This will extract all the relevant styles (colors, gradients, text styles, text contents) in your selection and will list them on this modal dialog :

On this screen, you can select which styles will be added as design tokens and define the names of the tokens.
Creating and Applying Themes
First, check Creating Themes section to see how theme states are defined and used in Toolabs DSM.
Setting your themes in Adobe XD is similar as can be seen in this video :